Monday, 23 March 2015

Technical File Week 8: Plaitting Masterclass

You will need: 

  • Brushes and pintail comb 
  • Hair ties
  • Hair clips 
Method: 

  1. 11 Strand Plait: 
  • Start with a 5 strand plait following the rhythm of over and under and tie at the ends when complete. 
  • Next to the 5 strand plait, start to create a three strand plait, looping a strand of the normal plait through the 5 strand plait each time it crosses. 
  • On the other side, create another 3 strand plait and link through the middle 5 strand plait. 
  • Can repeat this plaiting process all around the head if desired. 
 

   2. Weave Plait: 
  • Start with 5 strands and begin a 5 strand plait. 
  • Weave each strand over, under, over between the other strands of hair. 
  • Introduce a strand of hair from the head each time and you will end up with an additional strand each time. 
 

I found these two styles quite challenging to create, especially the weave plait- the basic shape was starting to form but I struggled to hold the pieces so it was very loose and messy, I will practice it more to achieve a neater look. 


Monday, 9 March 2015

Technical File Week 7: Timed Assessment


These are some images from my timed assessment of a Spring/ Summer look for my chosen brand of Urban Decay. I think the style worked well as it looked quite slick and I managed to get it to stay in place. However, I don't think it is the most flattering style for my model from a straight on angle and there is also one piece of hair on the right hand side which could have been smoothed. 

Monday, 2 March 2015

Technical File Week 6: Classic Shapes and Shilloutes

You will need: 

  • Water 
  • Hairdryer with nozzle 
  • Brushes and pintail comb 
  • Straightners 
  • Smoothing syrum 
  • Gel 
  • Hairspray 
Method: 

  • Wet down the hair so its damp. 
  • Use a paddle brush and a hairdryer with a nozzle and blow dry the hair straight and flat with the nozzle facing downwards. 
  • Straighten over the hair if needed. 
  • Once the hair is all straightened and flat, create a slick ponytail on the crown of the head.
  • The sides of the hair should brush up from the corner of the eyebrow diagonally up for a more fashion forward look. 
  • Use a pintail comb to smooth the ponytail into place. 
  • Can use some syrup/ gel/ hairspray to smooth the baby hairs into place. 


Monday, 23 February 2015

Technical File Week 5: Textures/ Natural Beach Hair

You will need: 

  • Water 
  • Mousse 
  • Sea salt spray 
  • Hairdryer and diffuser 
Method: 

  • Dampen the hair and put mousse through it. 
  • Put sea salt spray through the hair. 
  • If your model has curly hair, avoid the mousse and go straight to sea salt. 
  • Put a diffuser on the end of the hairdryer and put the diffuser under the ends of the hair. 
  • Thoroughly dry the hair, pushing it back off the face.  
 

Monday, 16 February 2015

Technical File Week 4: Plaitting for Fashion

You will need: 

  • Brushes and pintail comb 
  • Pins 
  • Hair Ties 
  • Hairspray 
Method: 


  1. Wiggle Plait: 
  • Create a three strand plait. 
  • Take hold of the middle strand of the plait and push he two strands either side up the middle strand to create a wiggle shape. 
  • Manipulate the plait to your desired look. 
   

  2. Waterfall Braid:
  • Start like you would start a french braid. 
  • Drop the middle strand and get your model to hold it. 
  • Get another middle strand from above the plait and incorporate it in and then plait, plait. 
  • Repeat this process and rhythm until complete.  


   3. 5 Strand Plait: 
  • Section the hair into 5 pieces. 
  • Start a normal plait with the end 3 pieces. 
  • Follow the rhythm of over and under. 
  • Always the outside strand going over then under. 
  • Outer strand goes over the piece next to it and under the middle strand. 
 

   4. Slip Tie Knot: 
  • Take the top front section of hair, split in half and tie a knot in the hair. 
  • Repeat the same process and get your model to hold the loose sections of hair. 
  • The model should always be holding 2 pieces of hair on each side. 
  • Incorporate the loose hair into the previous knot. 
  • When finishing, twist the ponytail of hair you have left into two pieces and pin up. 
  • Mess up the braid with a piece of course fabric rubbed over the hair for a more editorial look. 
 

I am pleased with the outcome of my plaits for first attempts. I found the slip tie knot quite tricky and next time I need to pull it a bit tighter in order to avoid any gaps.


Monday, 2 February 2015

Technical Week 3: Chignon with Accessories

You will need: 

  • Sectioning clips 
  • Brushes and pintail comb 
  • Hair tie 
  • Hair clips 
  • Hairspray 
  • Accessories for hair 
Method: 

  • Create your desired parting. 
  • Section off the hair from behind each ear and pin out of the way. 
  • Gather the rest of the hair ion a tight low ponytail. 
  • Backcomb the topside of the top half of the ponytail. 
  • Roll the ponytail up towards the head into a roll-like shape and pin. 
  • Using a pin, stretch the roll across the back of the head and pin either side. 
  • Release a front piece of hair from the clips, and twist or plait and pin on top of the chignon. 
  • Repeat with the other clipped section of hair. 
  • Add any desired accessories. 


I am pleased with my outcomes, and a particularly liked the look of the pink jewelled necklace on the chignon, but I could have done with putting some padding inside of the chignon as the necklace was very heavy so ended up squashing the design slightly. 

Monday, 26 January 2015

Technical Week 2: 50's, 60's and 70's Hairstyles


We see many influences from the ears of the 50's, 60's and 70's in todays fashion, hair and make-up styles, as fashions are always recycled but created with a new twist each time. In the 50's, barrel curls and strong side partings were popular amongst women, whilst the 'teddy boy' hairstyle as popular amongst men, and is often used as a style for women with shorter hair nowadays. The 60's style was  very volumised with a lot of bouffant at the crown of the hair. The 70's hair was also quite volumised with flicks and centre partings also being common features.    
  
You will need: 
  • Dry shampoo 
  • Curling tongs 
  • Paddle brush 
  • Pintail comb 
  • Hairspray 
  • Kirby grips and pins 
Method:  
  • 2nd day washed hair is easier to work with but if hair is freshly washed add dry shampoo to the roots and brush through well. 
  • Section hair off according to the style you want to create. 
  • Start at the top of the head and curl hair down towards the root vertically to crate lift. 
  • When removing the curling tongs from the hair try and keep the curl in tact and pin into place to set. 
  • Continue this process around the crown area of the head and then continue to curl the rest of the hair but don't pin into place. 
  • Remove all the pinned curls and brush them through with a paddle brush making sure the hair is being brushed between a flat hand and the brush to avoid static hair. 
  • Backcomb at the root taking care when doing so so that you don't knot the models hair. 
  • Smooth over the top of the back combed area either with a brush or with a piece of un-backcombed hair bought over the top of the backcombed area. 
  • Grip into place where required. 
  • Finish with hairspray. 


Here, I have created a 60's style half updo. I was not that happy with it, as I feel I should have backcombed the top section more to achieve more volume, and the section of hair at the front was too thick. I also should have brushed the curls out for a more authentic and sleek look. 


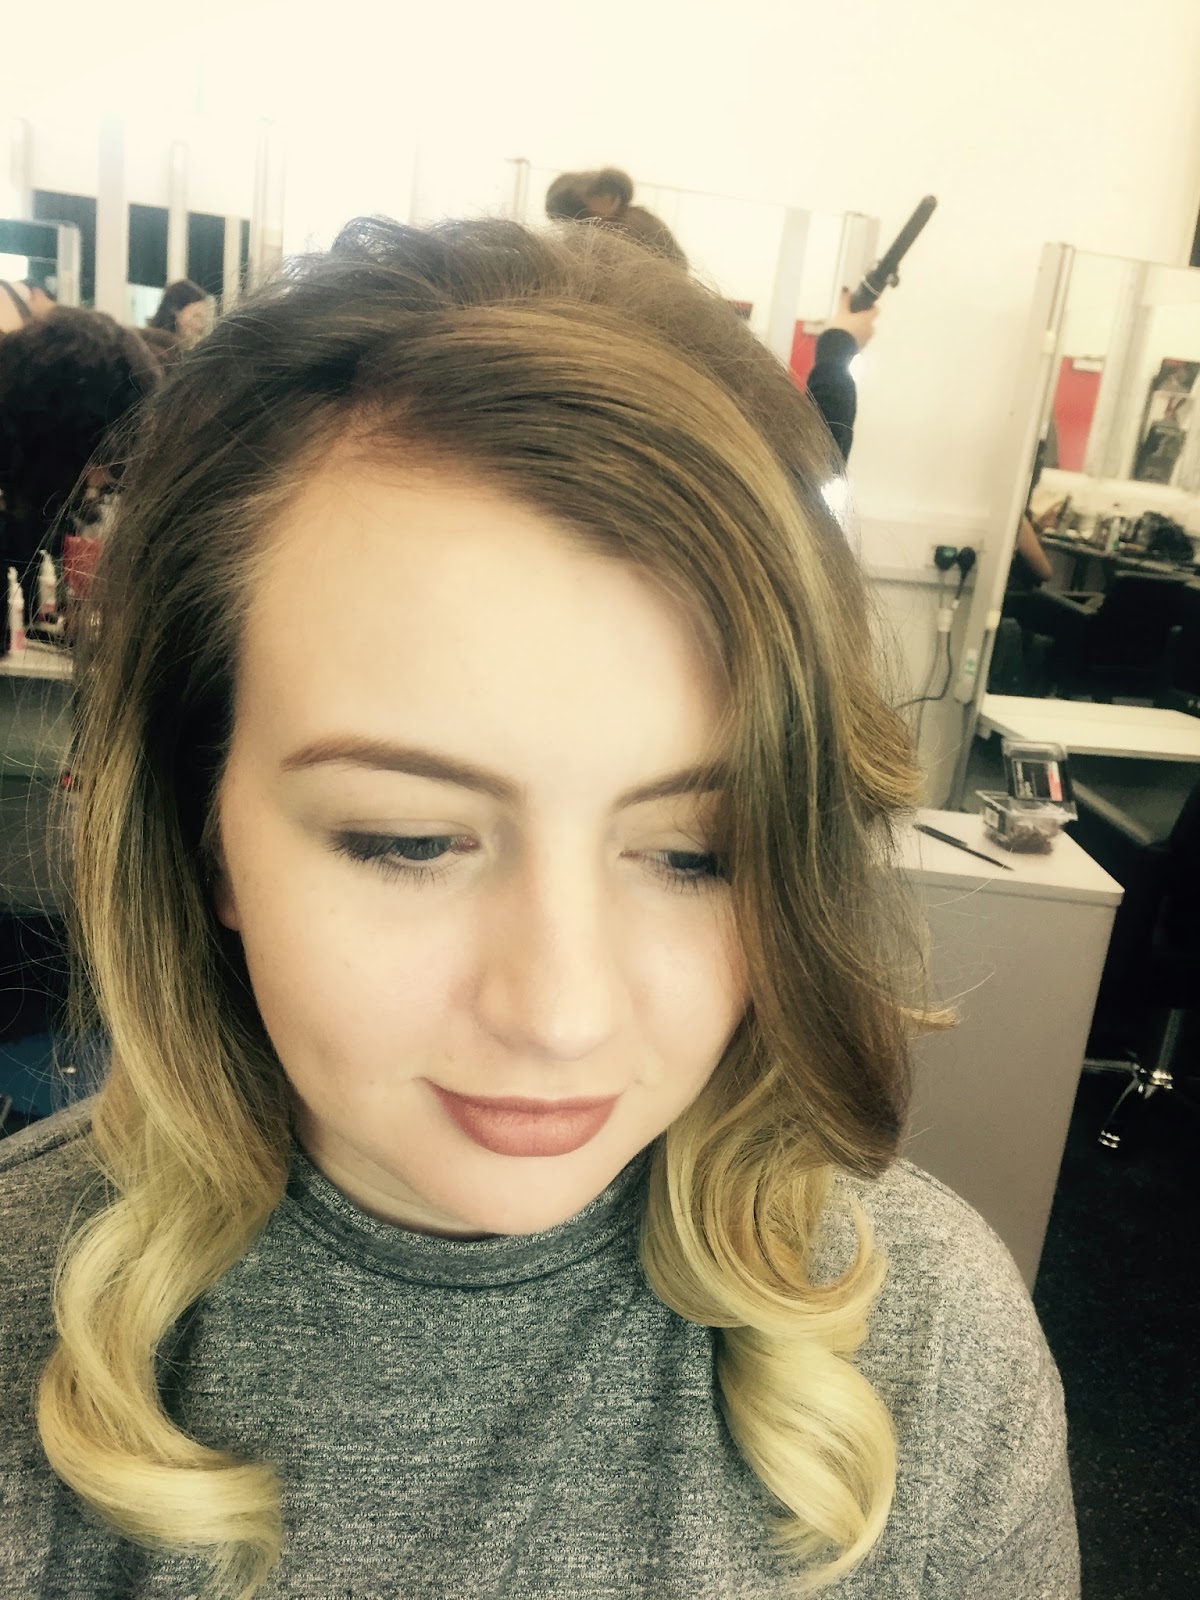
Here I decided to make the style a loose style, but I kept some of the shape of my first style and brushed out the curls to give a more smooth and finished look. I was happier with this style although I should have still back combed the root more to add in more volume to make it look more 60's.